|
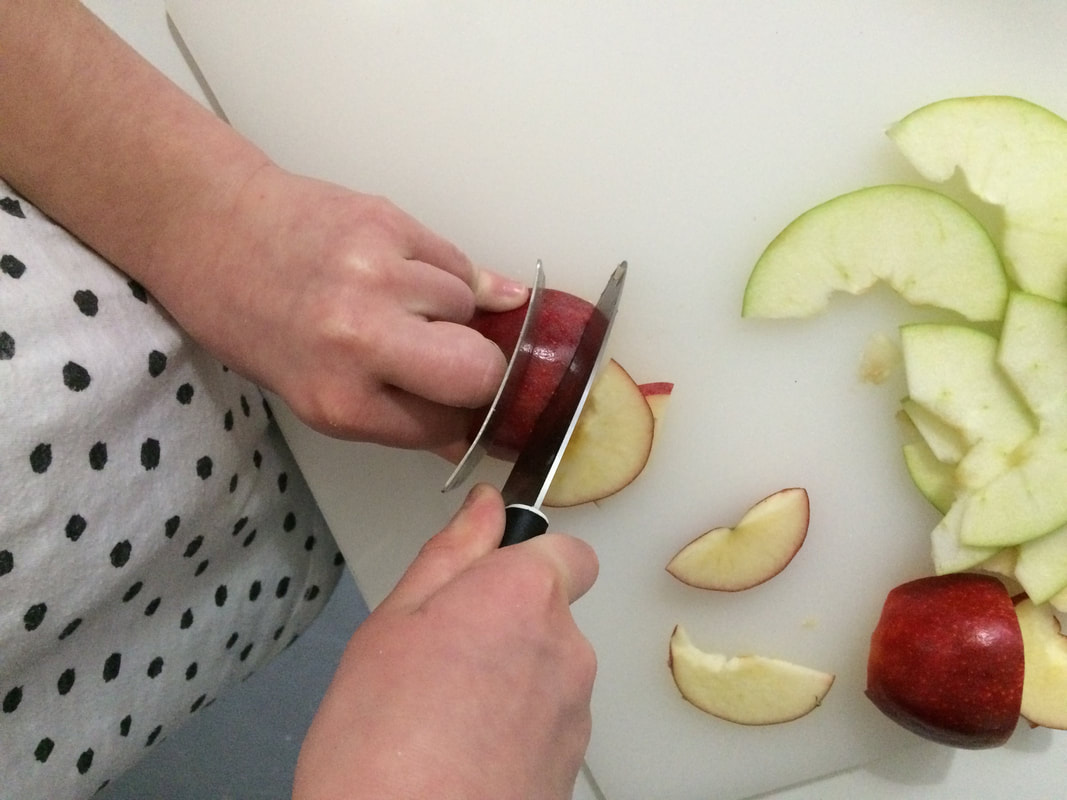
One of the most important things every chef should know is how to use a knife properly. Using a knife for the first time can be pretty scary. I remember learning to use my mother’s kitchen knives when I was a child—I was so nervous! Using a knife isn’t just scary for your kids, you may also feel a little hesitant about letting your little ones handle sharp objects. Now, if your kids are still very small, I would not recommend letting them use a knife or any sharp kitchen utensil just yet. If they’re old enough and you are confident in them, however, now is the time to teach them some knife safety with these tips! Always pay attention!Remember, knives are not toys. The most important thing you should tell your children to do when using a knife is to always pay attention. They need to keep their eyes on the knife, their hands, and their fingers at all times. Kids tend to be distracted easily and this can lead directly to knife cuts. Make sure there’s nothing in the kitchen that can distract your little ones while they are using a knife. If you have a kitchen TV, make sure you keep it turned off. Always keep a close eye on your kids when they are using knives in the kitchen (especially early on in their cooking journey). Use a cutting boardNever let your little ones use kitchen knives without a cutting board. It provides a stable surface to work on, while also avoiding any damage to your kitchen counter. I like to place a towel under the cutting board so there’s no chance of the board slipping and causing an accident. Use the right grip and cutting techniqueA very important thing to remember is to show your kids how to properly hold the knife. Teach them to wrap their hand around the handle and place their forefinger on the knife bolster. This is a safe and stable way to hold a knife. Next, show your kids the right way to cut. Place the tip of the knife on the board, and then carefully bring it down on what your kids are cutting. Avoid letting your kids cut rounded items for now since those could roll. Instead, give them something with a flat surface to cut, or cut off a slice of an item and lay it down on its cut side to keep it stable. You can even start them off by cutting soft food items, like dough or bananas, for now. The safest way to handle a knife is with a steady claw grip. Make sure your little one’s fingers form a claw on the item they need to cut. This will keep their fingertips safely away from the blade while cutting. Keep the knife away safely after useOnce your kids have finished cutting with a knife, teach them how to properly and safely keep it away. One thing I’ve noticed is that once kids become more confident in their knife skills (as they should) they start traveling around the kitchen with the knife—do not let them do this! When my kids took to doing this, I’d call out, “Knife walking!”, to stop them in their tracks. The phrase makes me chuckle, but walking around the kitchen with knives can be dangerous for both your kids and anyone else present in that space. It’s important that you nip any “knife walking” in the bud. Teach your kids to store their knives or place them down safely, somewhere where they are visible and accessible, once they’re done using them. Finally, clean up! Show your kids how to properly clean a knife without cutting themselves in the process. Also, remind them to never leave knives in a sink full of soapy water. If someone reaches into the water when there’s a knife in there, they could get a nasty cut. Practice knife safety for happier memories in the kitchenEvery cooking adventure starts with taking some precautions. While you can use a knife guard for your kids, I’ve found that proper knife safety is much safer and more necessary than a knife guard.
When you teach your kids to cook, you get the chance to make precious memories with them—memories you and your kids will always remember. So, make sure your kids learn how to use a knife safely while cooking and get ready for some amazing cooking adventures:)
1 Comment
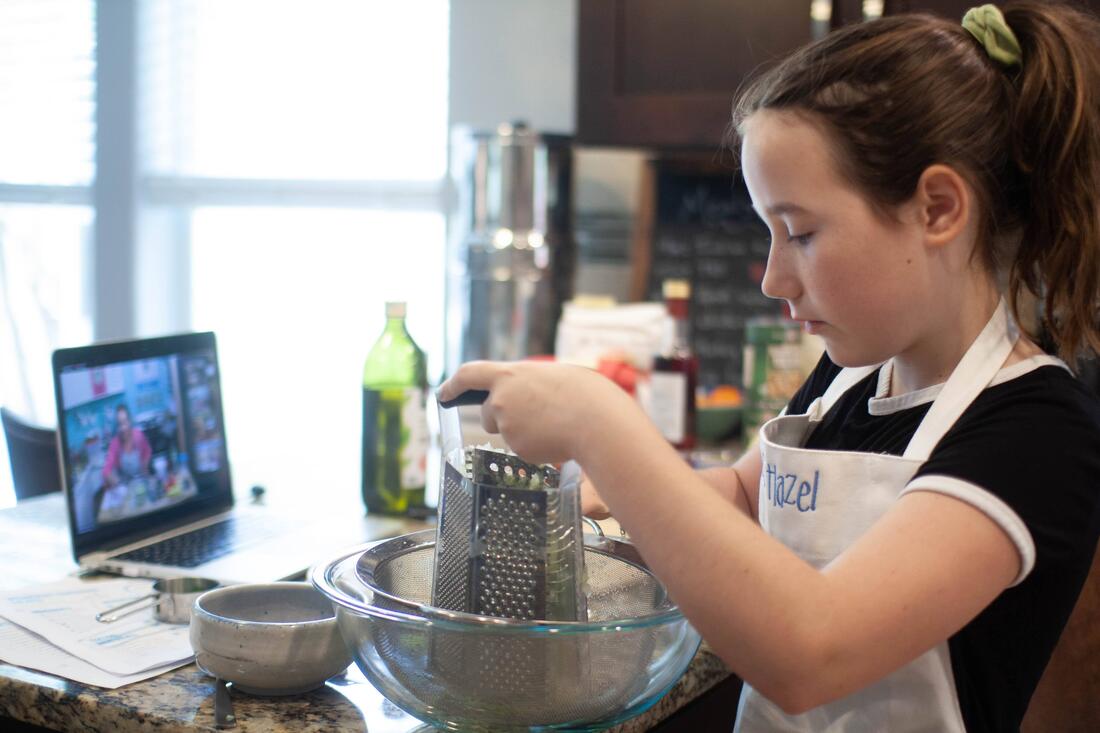
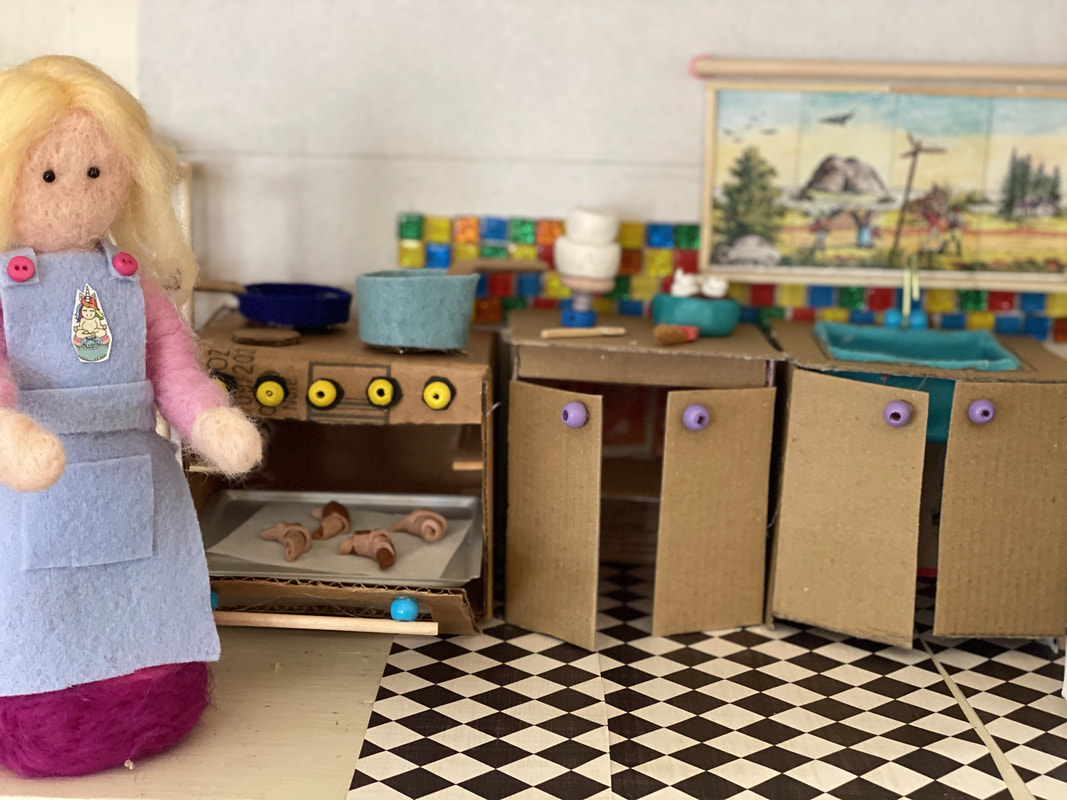
Sometimes, letting our kids into the kitchen can be very stressful. There are just so many things to worry about: Will they hurt themselves? Burn something? Leave the stove running? My belief has always been that the best way to help kids become more responsible in the kitchen is to give them some independence :) When you give your kids their own personal space and freedom, they tend to become more trustworthy and responsible. If you’re a parent, this can be a scary thought especially when it comes to the kitchen, but it’s a step we all need to take. Here are a few ways you can give your kids independence in the kitchen! Give your kids a place to store their cooking utensilsThe first step in giving your kids independence is getting them the right equipment. A good idea is to give your kids a set of their own kitchen utensils. These can include potholders, small pots and pans, and a fun, kid-sized apron! You can also give your kids their own set of knives if you are comfortable with it—if they are still very young, I recommend getting them started with plastic knives. Keep a small cupboard in the kitchen to store all of your children’s equipment and teach them to use it. If you don’t have a cupboard to spare, try getting them a small trunk or even a bucket. When your kids have their own equipment and space to store them, they will feel more independent and comfortable in the kitchen since they know where everything is and will know they have their own utensils. As part of this, teach your little ones to always wash their utensils before using them or putting them away! Get your little ones a small kids’ ovenWhen my son was younger, I remember getting him a little kids’ toaster he could use to make snacks for himself. He still has it today :) Small kids’ ovens, like the easy-bake oven, are safe and easy for kids to use—more than that, they’re gifts your little ones will always cherish! Keep the oven in the kitchen, so every time your children are in there, you can direct them to use that instead of the main oven—at least until you are ready to let them use it. Using a kid’s oven will help them understand some of the basics of baking and eventually, they’ll be baking snacks all by themselves! Get them involved in clean-up timeNow for one of my favorite parts of cooking—cleaning up! Cleaning up is super important and your little cooks should practice cleaning up every time they finish up their cooking adventures. If your kitchen is large enough, you can try sparing a small section for your kids to work in. Encourage them to clean up their little spot when they’re done. As I’ve seen, when kids have their own little corner, they feel motivated to keep it clean and tidy all by themselves! If your children are old enough, don’t let them run away after just cleaning up their spot in the kitchen. Ask them to help you tidy up the other areas and make sure everything is spick and span :) Giving your kids greater independence will make them better bakers!When kids are given their own space and their own tools, they tend to become good and responsible bakers :)
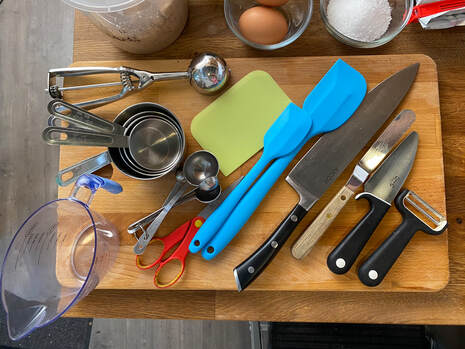
When you teach your kids to cook, you open up a whole new world of possibilities and give them the opportunity to have new cooking and baking adventures every day. When it comes to baking, measuring is key. It’s one of those little things that can make a huge difference between a dry cookie and a soft cookie, or a well-risen cake and one that ends up a little flat. A tip I often give people when they say they can’t bake to save their lives or that their last baking adventure was a disappointment is, “Check your measurements and try again”. As you gain more confidence and more experience in the kitchen, you can also start experimenting with recipes and taking liberties with measurements. Adding a little lemon zest, or cutting some sugar in your favorite, tried-and-tested recipe can take your treats to an all-new level! If you’re just starting out or just starting to introduce your kids to the wonders of baking, I recommend sticking to specified measurements. The good news is that learning how to measure ingredients is a very easy lesson to learn! If you’re teaching your kids how to measure ingredients for the first time, or just want to give them a quick refresher into what they already know before letting them back in the kitchen—here’s some information I’ve put together! Meet your measuring toolsStandard units of measurement differ slightly according to where you are in the world. In the United States, standard kitchen measuring tools are cups and spoons. Here’s how to use these tools, what ingredients can be measured with each, and some tips on how to measure your ingredients. Measuring cupsThese come in four different sizes: 1 cup (one cup) ½ cup (half a cup) ⅓ cup (a third of a cup) ¼ cup (a quarter of a cup) This measurement can be found inside the cup, on the handle, or sometimes even on the bottom of your cup. I personally find the ones that have the measurement marked on the handle much easier to use :) You generally use your cups to measure dry ingredients like flour, sugar, and powdered sugar. If you’re teaching your kids how to do the measurements themselves, you may want to demonstrate the easiest way to do this to help them avoid making too much of a mess. First, dip your cup into your dry ingredients and bring up a heaping cup full of it. Then, use an offset spatula or a butter knife to push off the excess gently and level your cup. Your flour shouldn’t be heaping over your cup, it should be level with the rim. The only time you will need to use a packing technique with your measurements is for brown sugar. Brown sugar is the only ingredient that will need to be packed down into your measuring cup. The process for that starts off the same as measuring any other dry ingredient. First, dip your cup into your brown sugar and sweep just a little bit of the excess back into your container. Then, press your brown sugar down into your measuring cup with your hand until it’s tightly packed. It’s as easy as that! Measuring spoonsMeasuring spoons also come in four different sizes: 1 tablespoon (one tablespoon) 1 teaspoon (one teaspoon) ½ teaspoon (half of a teaspoon) ¼ teaspoon (a quarter of a teaspoon) Your measuring spoons are for ingredients that are used in small amounts like baking flour, baking soda, and salt. You can use the same dip and level technique with your measuring spoons as you do with your cups. Dip your spoon into your ingredient like baking powder, then level it with an offset spatula or butter knife. Alternatively, containers like baking powder cans come with a little ledge that you can run your spoon across to sweep off the excess :) Liquid measuring cupWhen you’re measuring out your liquid ingredients like milk, water, and cream, you can use a liquid measuring cup if you have one. All you need to do is make sure you place your measuring cup on a level surface like a kitchen counter. Then, just pour your ingredient directly into the cup and watch it carefully to make sure you hit the right measurement that is marked along the surface of your cup. I like to bend down so my eyes are on the same level as the measuring cup for more accurate measurements :) Now that you know how to measure ingredients, you’ll be unstoppable!Learning little kitchen skills—like measuring—will set you and your kids on the right path to more delicious treats and much more success with all your baked goods :) Good luck!
Baking is a fun and healthy way to spend time with your kids and introduce them to the joys of cooking. When I was little, I loved cooking with my mother. We started with simple no-bake recipes until we were both more comfortable with me around the oven! Scaring your kids about the dangers of ovens is an easy way to make sure they don’t get hurt. Teaching them the safest way to use ovens, however, molds them to be more independent and gives them more confidence in the kitchen :) Ovens can be dangerous if not used carefully. Many kitchen accidents have been linked to ovens, so it’s very important that you teach your kids how to use an oven safely. Now, let’s look at how you can teach your kids about oven safety! Make sure their hands are protectedThe first and most important lesson you can teach your kids is to never touch the oven without protecting their hands. Make sure you have some good, child-sized oven mitts ready for your kids to use. Having a pair of potholders will be a good alternative if you don’t have any mitts available. Remember to keep your oven mitts or potholders dry because wet mitts and potholders actually conduct more heat and make them more dangerous than safe for your child. As an added precaution—get your kids to wear long-sleeved shirts to protect their arms while baking. This will offer them more protection while they’re navigating the kitchen and bumping into appliances. Once your little bakers are safely geared up, it’s time to turn on the oven! Getting the oven readyThe next important step in oven safety is getting the oven ready for baking. Before you start baking, you need to make sure your oven is ready to be used. Check if it’s empty and that your oven rack is in the right position (I like to keep mine in the middle because that’s where most of my baking takes place!). Now it’s time for the all-important preheating. Every oven is different, so show your kids how to turn on the oven safely and wait for it to be preheated completely. Certain ovens will give you a signal when they’re done preheating—this is an easy way to know exactly when the oven is ready to be used. If you’re not sure about the temperature of your oven, you can consider investing in a handy oven thermometer. All you need to do is hang it on your oven rack to check how it's heating up! I also recommend you let your little ones watch how you prepare the oven the first time around, and then supervise them as they learn to follow the process themselves. While the oven is in useNow that the mittens are on and the oven’s preheated, it’s time to get baking :) If your kids are very small, help them with the following steps or have them observe you. When opening the oven door, teach your kids to stand directly in front of it and open the door as wide as it will go (oven doors are heavy, so you may need to lend your little baker a hand with this step). After the door is open, teach them how to place their tin or cookie sheet on the oven rack securely and gently push it into the back of the oven. Once everything is in place, show your kids how to close the oven door safely. Now, set a timer and play the waiting game! Setting a timer is the best way to avoid burnt goodies and make sure your kids maintain a safe distance from the oven while it’s in use. It’s also a good way to make sure their impatience doesn’t get the better of them and they open the oven door before their goodies have a chance to be cooked through! Once the baking is done, show your kids how to take out the tin or cookie sheet (using a pair of oven mitts or potholders, of course) and place it on a cooling rack straight away. Then make sure they close the oven door completely. Now for another important part—turning the oven off. Teach your kids to never leave the kitchen without turning off the oven. To make it easier for your little ones to learn oven safety, make them a little checklist of things they need to do when working with the oven so they remember every step and they’re safer in the kitchen. Oven safety means more fun baking adventures!By teaching your little chefs how to use an oven safely, you can all look forward to many more successful kids’ cooking classes without the stress of kitchen mishaps! :)
|
AuthorBefore founding Bake Austin, Pascal Simon earned her degree as a Pastry Chef from the prestigious Auguste Escoffier School of Culinary Arts. A mother of two, Pascal is passionate about cultivating the next generation of bakers and welcomes children from all schooling backgrounds, whether public, private or homeschooled. Archives
October 2023
Categories |
|



 RSS Feed